
June 1, 2021
The official repository of Summer of Code 2021 is located at https://github.com/wyoibc/soc2021. Now that you have started following its contents, it makes sense to (1) have a copy of it on your computer, and (2) learn how to keep your copy current with what is upstream (i.e. on GitHub). If you were to copy this repository right now, you will have the most current version of it. But once I make any changes to the upstream, your copy will become slightly stale. In this section, we will learn how to make it current again.
git pull as often as you wish. For SOC2021, it is probably sufficient to pull it once a week. If you begin working on a project that is being updated more frequently, then you will benefit from pulling more often.When you used your login credentials to push contents of your local repository to a new and empty remote GitHub repository, you may have received an email-notice from GitHub that this method of authentication is deprecated. That’s computer science lingo for “about to be phased out”. What that means is that sometime soon, using username and password to push contents to github will no longer work (don’t confuse this with logging onto Github.com, which will still use those credentials.
Instead, you will be using a much more secure form of login called SSH, short for Secure SHell. A SSH password is called a key, which is much longer than a typical, secure password. But perhaps even more importantly, it is encrypted.
A SSH key comes as a pair of a public password, and a private password. You provide your public part to others who you wish to securely communicate with (i.e. Github in this instance). The private key should never be shared with anyone for any purpose. It will sit securely on your computer inside a hidden folder.
In this section, we will generate a SSH key pair and then associate the public key with your Github.com account.
ssh-keygen. It comes preinstalled with the OS. Windows users should be able to access this program inside git bash.Here, -t rsa flag tells the program to use RSA encryption algorithm when generating the private key. RSA stands for first initials of the three authors who developed this algorithm (Rivest, Shamir & Adleman) in 1977.
-b flag denotes amount of bits to use (size of the key)
-C flag allows a comment, which in this case is your email address associated with github. It will become part of your key.
Once you hit enter, your system will present the following dialogue:
Generating public/private rsa key pair.
Enter file in which to save the key (/Users/wyoibc/.ssh/id_rsa):
Notice that the keys will be stored inside your home directory in a hidden folder named .ssh.
By default the keys are named: id_rsa (private) and id_rsa.pub (public). But you don’t have to keep this name. If you wish to change is, type it out. An example could be: /Users/wyoibc/.ssh/t_rex. If you want to keep the default, just hit enter.
Next, the system will ask if you want to protect these keys with a passphrase. If you choose to enter a passphrase, you will need to memorize it and the system will ask you to enter it everytime you wish to use the key. I personally always use a passphrase.
Enter passphrase (empty for no passphrase):

Your identification has been saved in /Users/wyoibc/.ssh/t_rex.
Your public key has been saved in /Users/wyoibc/.ssh/t_rex.pub.
The key fingerprint is:
SHA256:4ps5bMhN7293Grtr0v+dCsUI4Ji02WQL9v+Wut7uOu4 name@host.edu
The key's randomart image is:
+---[RSA 4096]----+
|     + +         |
|    o % o        |
|     = = .       |
|        . . o    |
|      . S. . o   |
|     ...  . o    |
|   . =..   *.    |
|    o =+..* =o. o|
|     .+o=EBB=Booo|
+----[SHA256]-----+The key has now been copied to your clipboard.
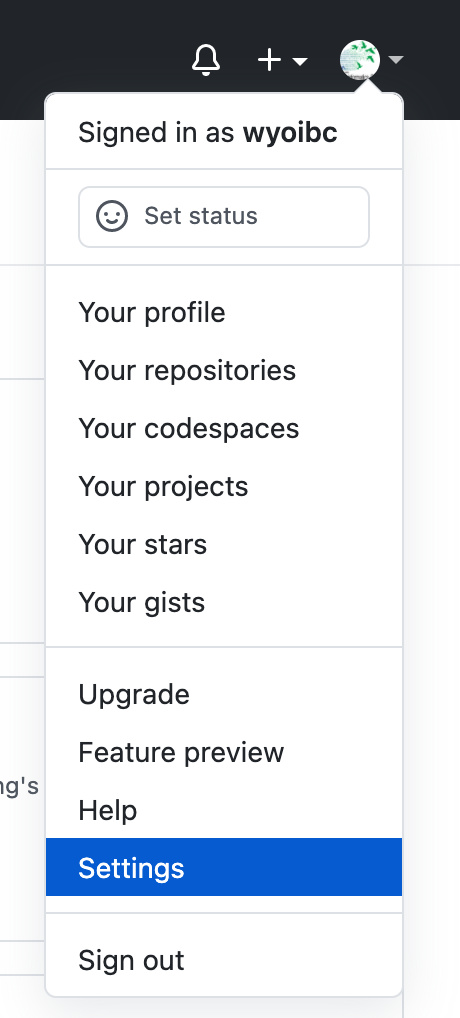
Next, go to GitHub.com and login to your account. Choose settings, and then SSH keys as follows:


New SSH key and use ctrl+V to paste your public key into the available box and choose a title. Leave no spaces in the title. A title is just an identifier for your key. Finally, choose Add SSH key to complete the process.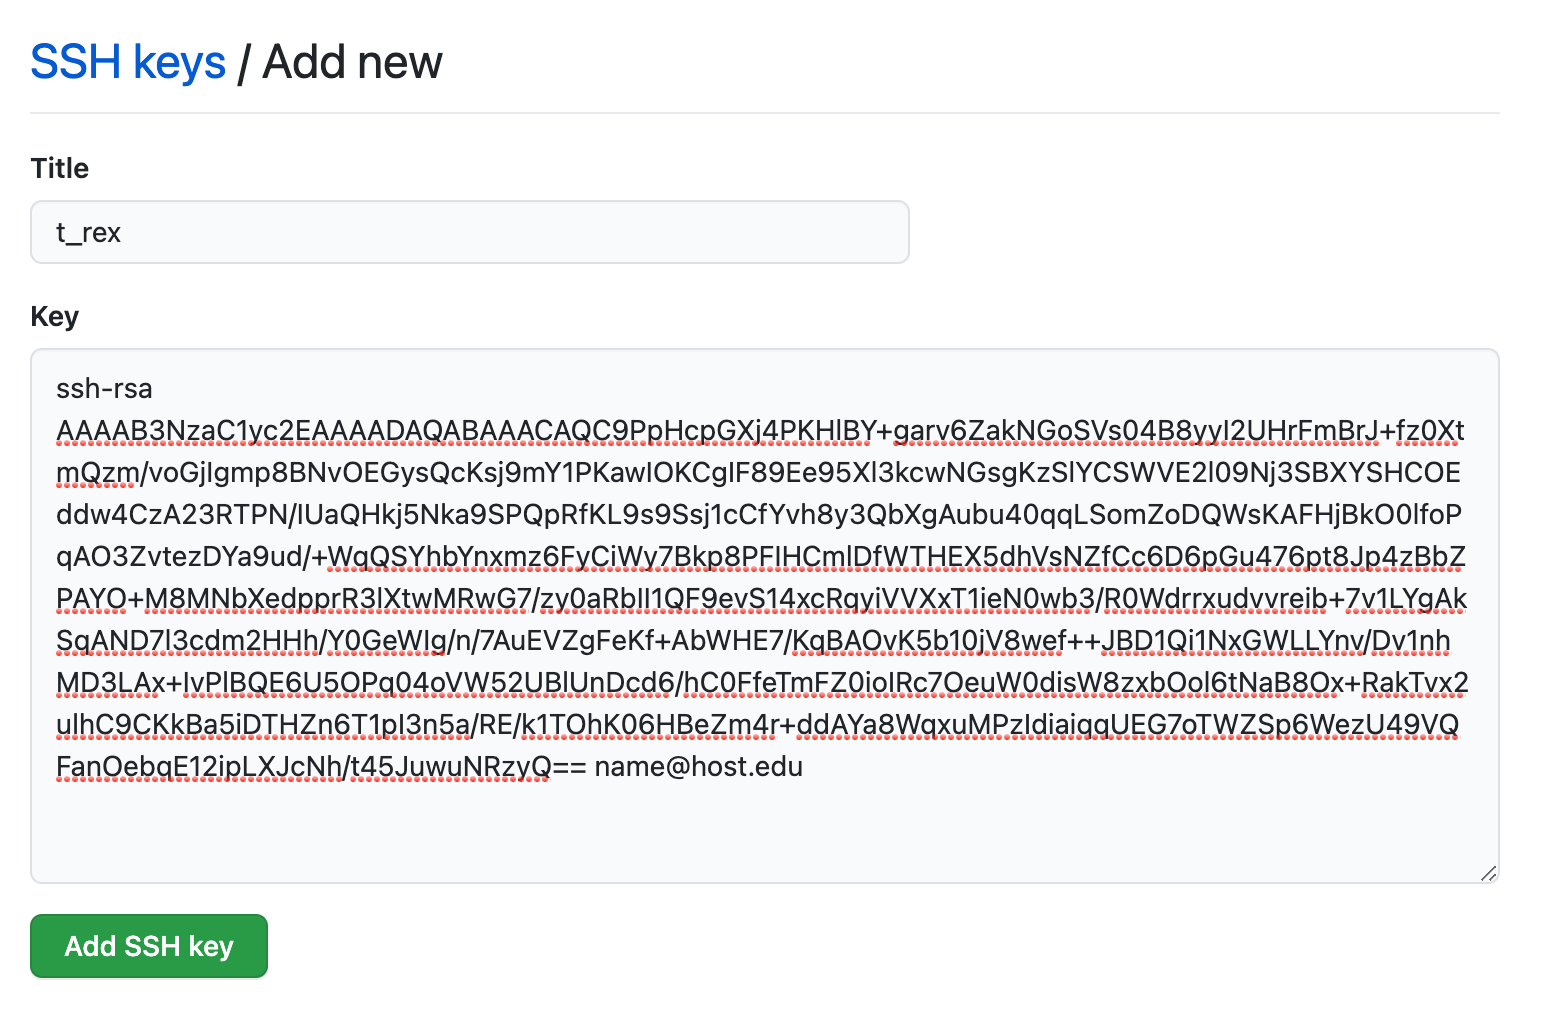
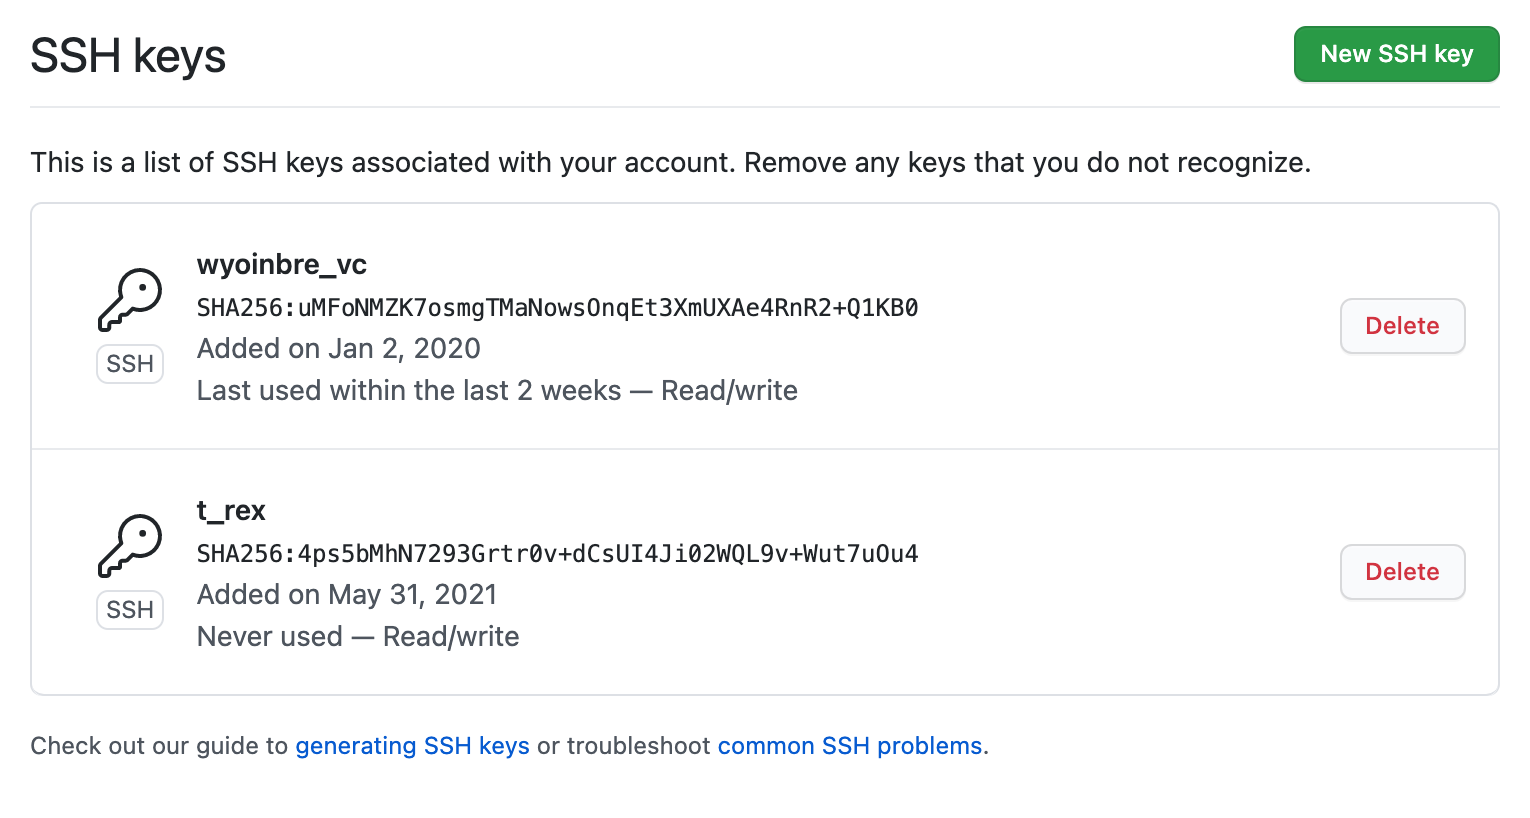
ssh-agent is enabled on your system, and add your newly created ssh key to the agent. If you set up a passphrase earlier, you will need to enter it now.Host *
AddKeysToAgent yes
UseKeychain yes
Host wyoibc.github.com
HostName github.com
User git
PreferredAuthentications publickey
IdentityFile ~/.ssh/t_rexNow let’s go back and make some changes to the git repository we created last time: testgit.
Let’s create a new plot to include number of deaths from COVID-19 over the same time period as before.
df <- read.csv("us.csv", header=T)

plot(1:489, df$deaths, pch=16, col="salmon", cex=0.5, xlab="Days", ylab="Num. Deaths")png("covid_combined.png", width=10, height=7, unit="in", res=600)
par(mfrow=c(1,2), mar=c(5,4,4,2), oma=c(2,2,2,2))
plot(1:489, df$cases, pch=16, col="darkgreen", cex=0.5, xlab="Days", ylab="Num. Cases")
plot(1:489, df$deaths, pch=16, col="salmon", cex=0.5, xlab="Days", ylab="Num. Deaths")
title(main="COVID-19 Cases and Deaths 2020-21", outer=TRUE, cex.main=0.9)
dev.off()---
title: COVID-19 Cases & Deaths
author: Vikram Chhatre
date: June 1, 2021
---
1. The following plot shows number of COVID-19 cases and deaths in the United States from January 2020 through May 2021.
<center>
<img src="covid_combined.png" width=700>
</center>One of the advantages of putting your work on GitHub is that it makes collaborating with others very easy. For this section, you will find a partner to collaborate with.
Share your GitHub user name with your partner.
One of you will be part of Bears team and the other of Foxes team.
Bears Generate New Repository and Initial ContentBears do the following:
Go to Github.com/YOUR_USER_ID and create a new repository called collab
On your local computer, create a new folder collab inside the GitHub folder you created last week.
Inside this folder, open a new file in vim named README.md
Type following content in this file:
Save and close the file (:wq in vim).
Initialize new git repository inside collab.
Configure the repository
Add, commit and push files to your new repository
If you carefully followed section#2 above, you should not get a password prompt. Your SSH keys should be used instead.
Finally, go to your new GitHub.com repository, choose Settings, then choose Manage access and invite your partner as a collaborator.
Foxes Clone Repository and Edit itFoxes do the following:
You should have received an email from GitHub containing invitation from your Bears partner to collaborate on the above repository. Go ahead and accept it.
Inside your terminal session, go to the Github folder you created last week.
Clone the collaborative repository inside this folder
Open the README.md file in vim and set it aside for now. We are going to generate some new content for the repo.
Fire up a new R session, either inside your terminal or in R-Studio.
Generate normal distribution of length=100, mean=5 and STDEV=2
rnorm_100 <- rnorm(100, 5, 2)
rnorm_100
[1] 3.2560410 3.9427234 6.5062322 2.6120940 8.4469923 3.7734777
[7] 6.6660813 6.7297231 7.6356562 1.2795508 8.7135774 4.7808433
[13] 3.2431209 4.5544523 8.0560542 5.1345238 4.5290398 3.0709138
[19] 4.9424754 4.9901400 4.8403945 4.7744570 4.9741091 8.5158795
[25] 6.7576175 3.1544909 5.1043582 7.2520960 4.7162988 5.2154195
[31] 5.6096246 7.2431140 5.3628224 7.0183478 3.0525487 5.7969017
[37] -0.2473231 5.4314736 2.9819134 5.6517750 5.1031163 5.2758484
[43] 3.9986785 3.6546439 1.0277276 8.2698047 2.9370657 3.8312321
[49] 5.1891104 -1.1718007 2.9092251 9.6024601 0.3102288 3.5233113
[55] 6.0785879 6.1443481 1.4895122 4.1123315 4.4962461 7.6709961
[61] 5.7954681 3.2487014 2.9246425 4.4178842 5.1267737 2.0772663
[67] 5.7256326 2.4347005 3.4792939 8.6661506 2.3007794 1.2865652
[73] 10.2528413 6.5529408 4.5308639 3.9096317 2.9602922 4.5660157
[79] 6.4765327 5.4774428 9.5770346 4.8439801 7.2007534 3.9652323
[85] 6.1064564 4.3177799 3.5924463 4.9280261 6.4032782 5.2160964
[91] 4.2959516 3.9489019 3.6501318 4.2419236 7.3105085 6.8059605
[97] 3.8606476 3.3618475 4.1134365 1.7566958Test how closely this vector fits normal distribution using the qqnorm function in R
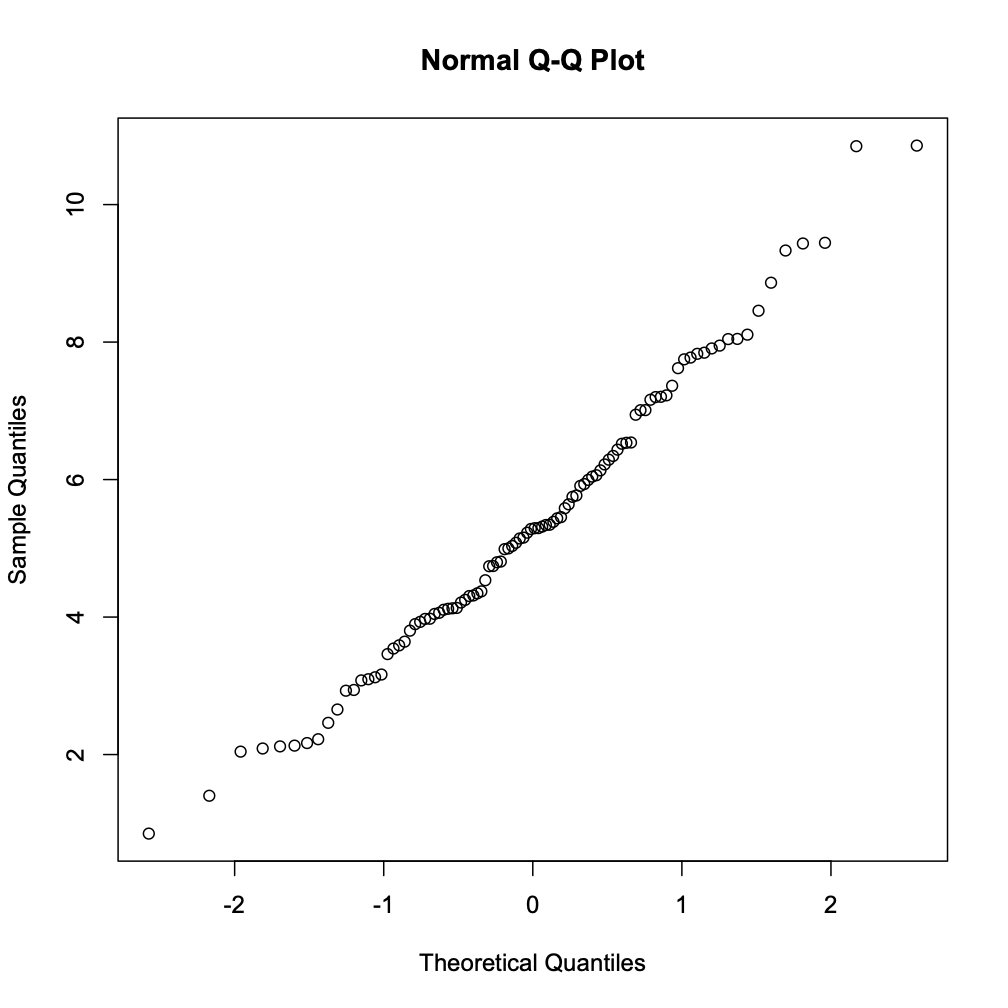
- Save this file as ``rnorm_100.png`` in the current folder.
- Now let's go back to ``README.md`` and update its contents as follows:
```bash
---
title: Collaborative Exercise in Github
---


## QQ Normalization
- Normalizatio using rnorm 100 sampling
<center>
<img src="qqnorm_100.png", width=500 />
</center>
```
- Save and close the file. Then perform git operations as follows:
```bash
git add .
git commit -m "Edit by Foxes"
git push origin master
```
- Verify that the contents were uploaded to your partner's Github repository (on which you are a collaborator).Bears Pull Updates and Add to the RepoBears do the following:
Perform git pull inside collab to bring your local version up to date with changes present upstream
We will now update the README.md again by expanding the normal distribution from 100 to 1000 and 5000 respectively.
Fire up your R session:
Update the README.md to include these two new figures
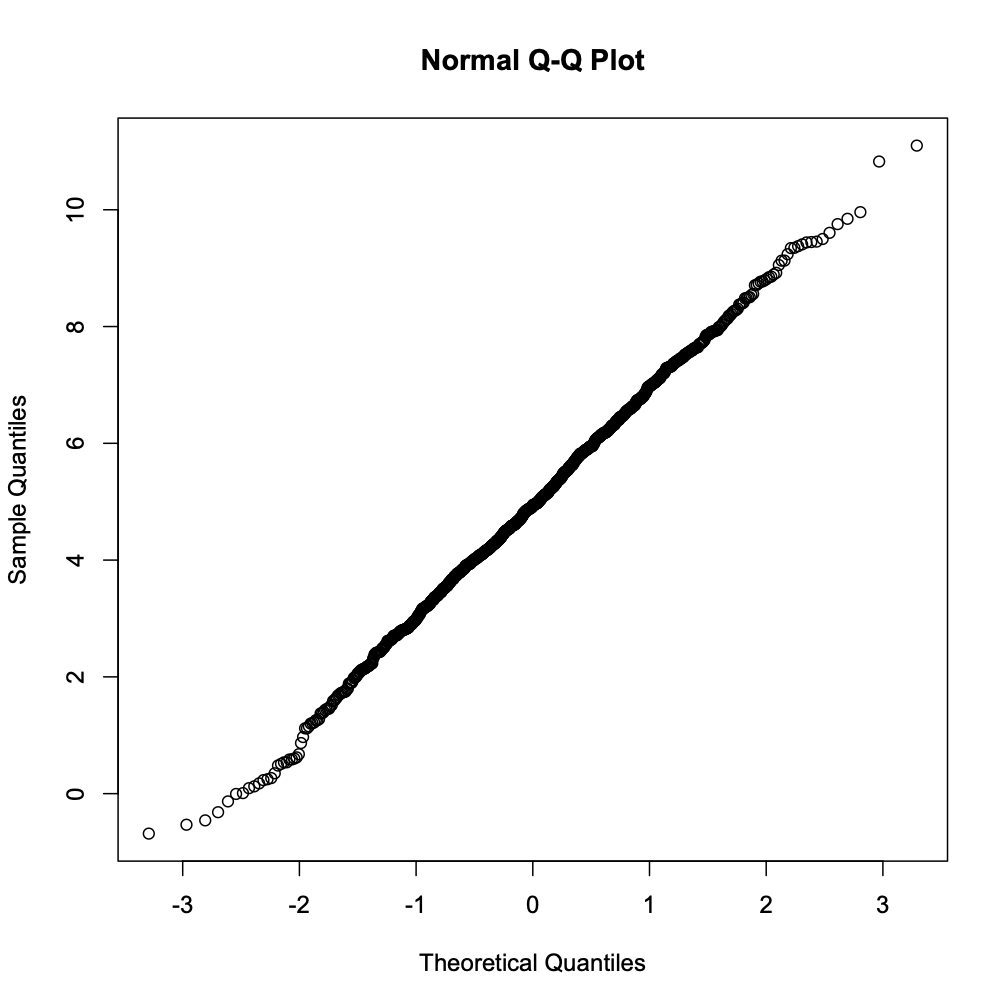
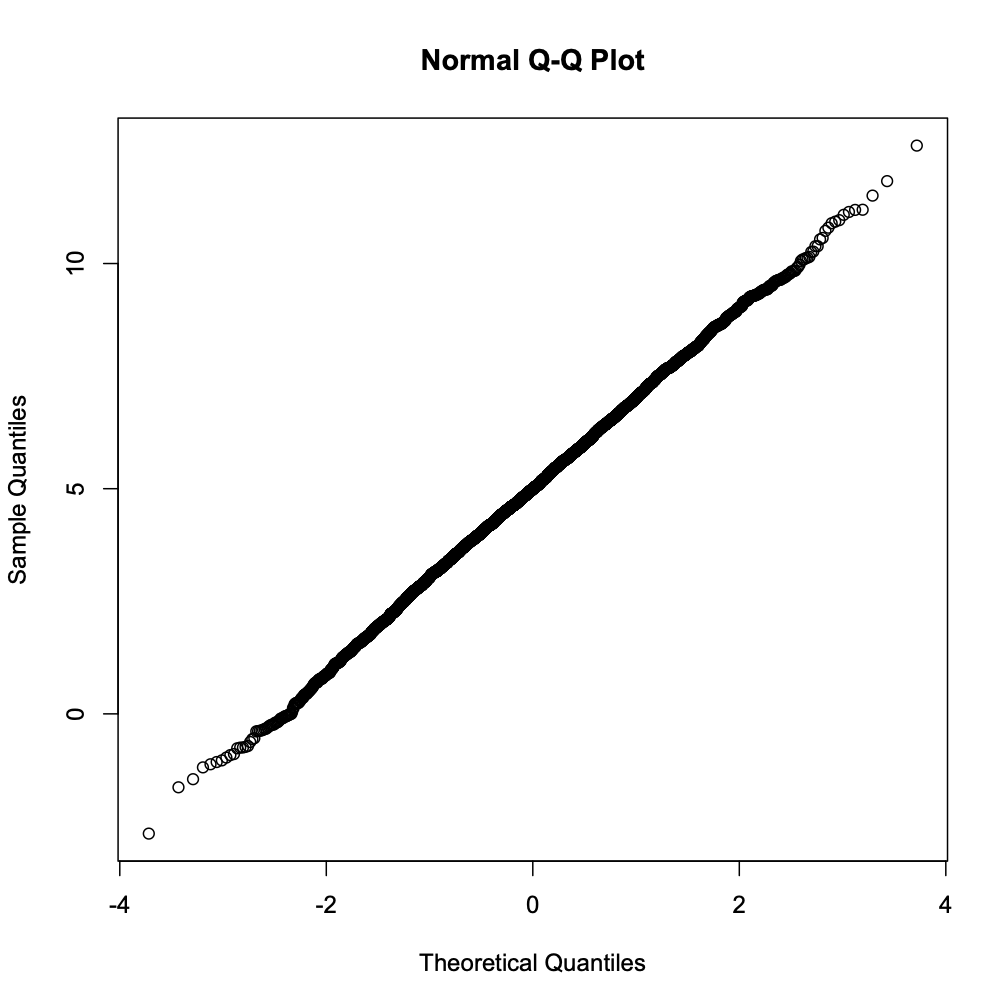
- Finally, push the updates upstream with ``git add``, ``git commit`` and ``git push``Foxes Pull UpdatesFoxes will use git pull to update their local repository with the changes that were made by ``Foxes. After this operation, open the README file to make sure you got all the changes. You won’t see figures inside README, but they should be present in the folder.